Monday, October 30, 2006

Cooking essentials- knife and cutting board


My favorite two things in my kitchen are my knife and my cutting board. In my opinion, have a good quality knife and a sturdy, non-slip cutting board are absolutely essential to any kitchen.

The basic types of knives are:
-chef's knife- broad, stiff, slightly curved blade around 5-9 inches long. Used for chopping as well as slicing, dicing, mincing.
-paring knife- looks like a small chef's knife with a tapered blade and about 3-4 inches long. Used for peeling and slicing fruits and veggies.
-bread knife- has a straight, serrated blade at least 8 inches long and is used to cut through breads, cakes or baked goods.
-carving (or slicing) knife- long, slender blades that are used to carve or slice meats and large vegetables.
-utility knife- like a paring knife, but usually with a slightly curved blade. It can be used for carving small cuts of meat.
-boning knife- has a narrow, slightly flexible curved blade 5-7 inches long and is excellent for separating cooked or uncooked meat from the bone, carving a roast, or peeling fruits and veggies.

I personally prefer a chef's knife. I use it in all my cooking preparations. My favorite? A Wusthof Santoku 7 inch knife. You can see it here.


Why is a cutting board so important? Well, because you cut all of your fruits, veggies and meats on them. On it, you can prep all your ingredients for your meals. According to Southern Living's Secrets from the Southern Living Test Kitchen, a cutting board is "a flat surface of either wood or plastic polyethylene on which food is sliced or chopped. Some cutting boards have a carved edge to catch meat drippings. Always wash plastic boards in hot, soapy water, or run dishwasher-safe ones through the dishwasher to disinfect. Clean wooden boards with a mixture of 1 part bleach to 8 parts water, then rinse. We suggest using two boards: one just for meats and one for everything else. Or, if you have only one board, mark a side of the board exclusively for meat."

My personal choice for a cutting board? Well, the one I use for raw meat is just a regular plastic board I bought at Bed, Bath & Beyond. But my FAVORITE one that I use for everything else (including COOKED meats)is a Boos board.

Friday, October 27, 2006

Are you a lady?


My last post left me thinking... are you a lady?

Thursday, October 26, 2006

Where have all the ladies gone?


Mr. U and I were in town today running errands. You know, the usual- post office, bank, Wal-Mart. I sat waiting in the car while Mr. U went into the post office to mail off a package and some letters. As I sat there, I started noticing all the ladies that were walking in and out of the post office. It was 12:30 in the afternoon and about 90% of these ladies looked as if they had just gotten out of bed!!! Why would any lady want to leave the house looking like that? Where have all the ladies gone?

It doesn’t take very much time or effort to make sure that you are well-groomed before leaving your home. Here are three short and easy ideas to get you started:

Press your clothes. Yes, I am serious. Get out your iron and actually iron your clothes. Walking around with wrinkled clothing is so unbecoming on a lady. This is something I expect to get onto my teenage son about, not adults. It only takes a few minutes to heat up the iron and press your clothes. No experience ironing? Well, like my mother always says “Practice makes perfect”.

Fix your hair. You would think that a lady would want to brush her hair, wouldn’t you? Men make fun of us all the time for taking hours on our hair, but you would not believe how many ladies I’ve noticed with unkempt hair! Yes, WOMEN!! I’m not talking about children here, but grown adult ladies. Please, comb your hair. It only takes a few minutes.

Put a smile on your face. Why would you want to walk around looking like you are mad at the world? Smile. It’s free and takes no time to do and preparation. Simply smile. Not only will it brighten you up, it’ll brighten up all the people whose path you will cross, too!

Ladies, it only takes a few minutes to do these. Why not start TODAY!!! Don’t leave the house looking unkempt. Take a moment to ready yourself for the day. I’m not asking you to spend hours getting ready nor am I asking you to go out and buy designer clothing, but I am asking you to look a little more ladylike. Not only will you look better, but you will feel better as well.

Tuesday, October 24, 2006

October 31- What to do??


Calling all Christian families!!!!!!

I just read an excellent article on Halloween on this blog. What do you think? Does your family "celebrate" this day? If so, why? Before you say "we did when I was growing up", read the article.

Neat site!!!!


HowManyOfMe.com
LogoThere are:
2
people with my name
in the U.S.A.

How many have your name?


I found this over at Leslie's blog.

Monday, October 23, 2006

Brown Sugar Substitute


The other day I found myself in a quandary. I needed dark brown sugar to make some cookies but I only had light brown sugar. What to do??? I found this site and it solved my problems!! I figure that surely I'm not the only one to ever have run into this dilemma before, so here's what I found out...


Brown Sugar Substitute
-For each 1 cup firmly packed light brown sugar called for in a recipe, use 1 1/2 tablespoons molasses plus 1 cup granulated sugar.


-To make light brown sugar from dark brown sugar, use 1/2 cup firmly packed dark brown sugar and 1/2 cup granulated sugar.


-For dark brown sugar, use 1 cup firmly packed light brown sugar plus 1 tablespoon molasses; or 1 cup granulated sugar plus 1/4 cup molasses.

Friday, October 20, 2006

Do you know where your purse has been?


Its' something just about every woman carries with them. While we may know what's inside our purses, do you have any idea what's on the outside? Shauna Lake put purses to the test – for bacteria – with surprising results. You may think twice about where you put your purse.


Women carry purses everywhere from the office to public restrooms to the floor of the car. Most women won't be caught without their purses, but did you ever stop to think about where your purse goes during the day?


“I drive a school bus, so my purse has been on the floor of the bus a lot,” says one woman. “On the floor of my car, probably in restrooms.”


“I put my bus in grocery shopping carts, on the floor of bathroom stalls while changing a diaper,” says another woman. “And of course in my home which should be clean.”


We decided to find out if purses harbor a lot of bacteria. We learned how to test them at Nelson Laboratories in Salt Lake, then we set out to test the average woman's purse. Most women told us they didn't stop to think about what was on the bottom of their purse. Most said they usually set their purses on top of kitchen tables and counters where food is prepared.


Most of the ladies we talked to told us they wouldn't be surprised if their purses were at least a little bit dirty. It turns out purses are so surprisingly dirty, even the microbiologist who tested them was shocked.


Microbiologist Amy Karren of Nelson Labs says nearly all of the purses tested were not only high in bacteria, but high in harmful kinds of bacteria.


Pseudomonas can cause eye infections, staphylococcus aurous can cause serious skin infections, and salmonella and e-coli found on the purses could make people very sick. In one sampling, four of five purses tested positive for salmonella, and that’s not the worst of it.


“There is fecal contamination on the purses,” says Amy.


Leather or vinyl purses tended to be cleaner than cloth purses, and lifestyle seemed to play a role. People with kids tended to have dirtier purses than those without, with one exception. The purse of one single woman who frequented nightclubs had one of the worst contaminations of all.


“Some type of feces, or even possibly vomit or something like that,” says Amy.


So the moral of this story – your purse won't kill you, but it does has the potential to make you very sick if you keep it on places where you eat. Use hooks to hang your purse at home and in restrooms, and don't put it on your desk, on a restaurant table, or on your kitchen countertop.


Experts say you should think of your purse the same way you would a pair of shoes.


“If you think about putting a pair of shoes onto your countertops, that’s the same thing you’re doing when you put your purse on the countertops,” says Amy.


The microbiologists at Nelson also said cleaning a purse will help. Wash cloth purses and use leather cleaner to clean the bottom of leather purses.

From KUTV

(© MMVI, CBS Broadcasting Inc. All Rights Reserved.)

Thursday, October 19, 2006

SLOW COOKING THURSDAY!!!


Well, we're there again- at Slow Cooking Thursday!! I LOVE this day! I get to go visit all the other blogs that are participating in this fun event!!

You want to check out the other recipes? Go see Sandra at Diary of a SAHM and get some great crock-pot ideas!!!


Crock-pot Bacon Chicken Breasts

6 boneless skinless chicken breasts- FROZEN
12 slices raw bacon
1 can condensed cream of chicken soup
1 box stuffing mix
6 slices Swiss cheese

Spray crock-pot with cooking spray. Place the stuffing mix on the bottom (add flavor packet if it is separate). Wrap each frozen breast with 2 slices of bacon. Place on top of the stuffing mix (this is still dry at this point) Pour can of soup over top of chicken. Cook on LOW all day (7 to 10 hours) or on HIGH for 5 to 7 hours. Fifteen minutes before serving, place cheese slices on top to melt.

Serve with green beans or a big salad!!!

I have NO idea where I got this recipe. I've been making it for abut 6 years now and my Mr. U just LOVES this stuff!!!

Wednesday, October 18, 2006

~Recipe Swap: Simmering Soups~

Tammy over at Tammy's Times is hosting a Recipe Swap!!! This is my recipe to "swap". We had this today, as a matter of fact, for lunch. I served it with some hot French bread. Yummy and warm.


Pumpkin Black Bean Soup
1 onion, chopped
4 garlic cloves, minced
1 T ground cumin
1/2 t ground black pepper
2 T olive oil
3 15 oz cans black beans, rinsed, drained and pureed
1 cup canned tomatoes, pureed
4 cups fat free beef broth
1 16 oz can pumpkin puree
1/2 pound cooked lean ham, diced
3 T red wine vinegar

In a 6 quart kettle, cook the onion, garlic, cumin and pepper in olive oil over moderate heat. Stir in beans, tomatoes, broth and pumpkin until combined. Simmer uncovered for 25 minutes.. Add ham and vinegar and heat through. Serves 10.

Monday, October 16, 2006

It's that time of year again...


Well, folks, it's that time of year again. Time when people start getting sick. Eww. I cannot stand being sick. Even worse than that, I cannot stand my family being sick. So, what's a wife and mom to do? Why, make Chicken and Rice soup, of course!!!

Here's the recipe I make every time we start getting sick. Yes, I know there is a lot of garlic in it. We LOVE garlic (if in doubt, see this post) and it is very good for you. But, feel free to use less or even leave it out completely if you wish.


Mrs. U's Chicken and Rice Soup

2 onions, chopped
3 celery stalks, chopped
1 ½ cups shredded carrot
1 bulb garlic, minced
3 T extra virgin olive oil
8 cups chicken stock (preferably homemade)
2 bays leaves
1 T peppercorns, whole
½ jalapeno, chopped finely
2 boneless, skinless chicken breasts
1 ½ T dried parsley
1 ½ cups brown rice
Salt and pepper to taste

Heat olive oil in stock pot on med high heat. Sautee onion, celery and carrot in olive oil for about 10 minutes (until softened). Stir in chicken stock, bay leaves, garlic, peppercorns and jalapeno. Drop in chicken breasts. Bring to a boil and then cook over medium low heat for about 30 minutes. Remove chicken and chop into bite sized pieces and return to pot. Stir in parsley and brown rice. Cook 45 minutes until rice is done. Season with salt and pepper to taste.

Friday, October 13, 2006

Wintering ferns...


This morning, I finally moved my beloved ferns inside. Why are they beloved? HA! They are the first ferns in my life that I haven't killed off (yet)!!!


I've been trying my best to take care of these babies all summer long. Now it's turning cold and we're expecting temps in the upper 30s tonight. So I had to make sure that these guys were safe and warm inside our home.


I had NO CLUE what I needed to do with the ferns- I just knew that they needed to be inside where it was more warm.  I also gave mine a "haircut". HA! They were so big and bushy (yes, believe it or not- not only did I NOT kill them, but I got them to be big and bushy, too!!!) and I figured a good trim wouldn't hurt them. So, what you see in the picture is the result of their trim.


If any of y'all happen to know of any proper winter fern care tips, please let me know. I really REALLY want to see if I can get these fellas to live through next summer, too!!

Thursday, October 12, 2006

SLOW COOKING THURSDAY!!!


I really enjoy being part of Sandra's Slow Cooking Thursday. SOOO many excellent ideas for my crock-pot!!! What?? You don't use yours as often as I do? Well, what are you waiting for? Pull it out and get cooking. Well, actually, pull it out, throw your ingredients in, leave the house for several hours and come home to a wonderfully delicious and healthy meal for your family!!!


Crock-pot Italian Chicken and Potatoes

2 boneless, skinless chicken breasts
1 cup Italian salad dressing
1 tsp Italian seasoning
½ cup grated Parmesan or Romano cheese
4 potatoes, peeled and chopped into bite size pieces

Place chicken in bottom of crock pot. Sprinkle with ½ of the dressing, spices and grated cheese. Put potatoes on top. Sprinkle with remaining dressing, spices and grated cheese. Cook on low 6 to 8 hours or until chicken and potatoes are tender. (Also, I cut my chicken into bite size pieces when it is done. That way, I use less chicken but my family never notices because it is all mixed in together.)

This serves the four of us plus a little left over. Serve it up with a big salad or even some sauteed zucchini. YUM!!


Oh, and remember y'all, it is perfectly alright to use FROZEN chicken! Yes, m'am, just throw it in frozen! The crock-pot will do the thawing for you!!

Mrs. U's Fall Vitamins...

Yes, you read that correctly. These are my FAVORITE "vitamins" to take every fall!! HAHA!!

Seriously, though, each fall when the leaves start changing and the weather gets that familiar crispness to it, I crave candy corn!! I don't know why. I cannot explain. I just have to buy a bag and eat it. I shared this idea with my sister a few years ago and she feels the same way- candy corn and fall are just meant to be together.

So, where did candy corn come from, you ask? According to Candy USA!...

"Candy corn has been around for more than 100 years. George Renninger, an employee of the Wunderlee Candy Company, invented the popular confection in the 1880s and Wunderlee became the first to produce the candy. The Goelitz Candy Company (now Jelly Belly Candy Company) started producing the confection in 1900 and still produces candy corn today.

When candy corn first appeared, it was popular among farmers because of its agrarian look. The tri-color design was considered revolutionary and the public went crazy for it..."

So... who's up for sharing a bag of candy corn with me??


Wednesday, October 11, 2006

October is Clergy Appreciation Month!!!


Did you know that October is Clergy Appreciation Month? So, how are you celebrating it?


Clergy Appreciation Month is a special time that congregations set aside each year to honor their pastors and pastoral families for the hard work, sacrificial dedication and multiple blessings provided by these special people. It is typically scheduled in October, but can be held at any time that is convenient for the church and the community. It is also important to remember that appreciation, affirmation and prayer support of our spiritual leaders is appropriate throughout the entire year.


You can read more about it here. At least let your pastor know that you appreciate him and that you are praying for him (and actually do it!!!).

Saturday, October 07, 2006

Pumpkin Oatmeal and Pumpkin Pie Spice Mix...


I've REALLY been on a pumpkin kick this week. So much so that when my sister suggested that I add pumpkin puree to my oatmeal, I did it!! The result? AWESOME tasting oatmeal!! Not only did it taste great, but just THINK of all that fiber- not only from the oats, but there's a whopping 5 grams of fiber in only 1/2 cup of pumpkin!!! This is definitely a GREAT way to start the day!!!


Pumpkin Oatmeal
1/2 cup old fashioned oats
1 1/4 cups water
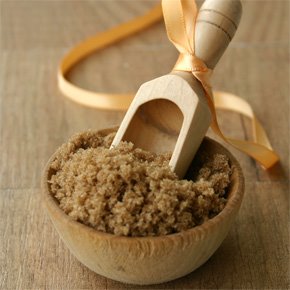
2 T brown sugar
1/2 cup pumpkin puree
pumpkin pie spice


Put oats and water in a pot and bring to boil on the stove. Stir so it doesn't stick to the bottom of the pot. Once it boils, remove pot from the eye and cover. Let sit about 2 minutes. Stir in brown sugar, pumpkin and pumpkin pie spice (to taste).


This is 1 serving.


No Pumpkin Pie Spice in your pantry? That's okay... Just mix these together and make your own!!!

1/4 c Ground cinnamon
1 T Ground ginger
2 t Ground nutmeg
1 t Ground allspice
1 t Ground cloves

This makes about 1/2 cup so it'll last you for a bit.

Friday, October 06, 2006

I LOVE garlic!!


(image from here)


It's "that" time of year again. I was in Wal-Mart earlier today and I felt it hit- the start of a cold. Ugh. In the U household, that can only mean one thing- GARLIC!!!

I LOVE garlic no matter what form it comes in- even raw!! Good thing, too, because when one of us is sick, I pull out the garlic and we each chew a raw clove of it.

WHAT???? You are screaming, RAW garlic?? Yes, raw garlic. It is SO very good for you. It's antiviral, antifungal, antibiotic... wait, just check out this list:

Health & Medicinal Benefits of GarlicPowerful immune system enhancer
Antibacterial, antiviral
Antifungal - effective remedy for yeast infections & candida
Clears boils & infected sores
Improves appetite
Digestive aid - especially good if eaten with meat
Increases libido - take several raw cloves a day
Expells intestinal parasites & worms
Reduces high cholesterol

Be sure and click on the link above to read even more about the benefits of eating raw garlic. You could also look here.

It does take a bit to get used to eating raw garlic, but once you do you'll be looking forward to it because you know it'll make you feel better. It's truly a gift from the Lord to have something so compact contain so very many needed health benefits. Why not try some raw garlic tonight?

Oh, before I forget, when you do decide to chew (and swallow, by the way!! LOL!) raw garlic, do it at night. That way, you don't walk around all day with massive garlic breath. You will have a slight taste of garlic the next morning, but once you eat breakfast and brush your teeth, the garlic taste is gone.

(In the picture above, the big cluster of garlic is called the "bulb" or "head". Each little piece that can be broken off is called a "clove". )


Thursday, October 05, 2006

Crock Pot Provincial Chicken


Greetings all you crock pot lovers!!! Sandra over at Diary of a "Stay at Home Mom" has something special going on- it's called Slow Cooking Thursday. What fun!! So, in order to join in, here's my crock pot meal.
I've been making this for years and Mr. U LOVES this (and so do I!!). You can easily use less chicken if you would like or even more zucchini if you have it handy. Also, I've made this with the 98% fat free cream of chicken soup and it's been just as tasty as well as using light sour cream instead of the regular sour cream.


So what are you waiting for? Pull out your crock pot and let's get started!!


Crock Pot Provincial Chicken

4 boneless, skinless chicken breast halves
2 medium zucchini, diced
2 tablespoons balsamic vinegar
2 15-ounce cans diced tomatoes, undrained
1 10¾-ounce can cream of chicken soup
2 tablespoons dried parsley flakes
1 teaspoon dried basil leaves
1 tablespoon dried minced onion
1 cup shredded cheddar cheese
½ cup sour cream
Cooked pasta or white rice

Combine all ingredients except the cheese and sour cream in a slow cooker. Cover and cook on low for 6-8 hours. Remove the chicken, cut into bite-size pieces and return to the slow cooker. Stir in the cheese and sour cream and cook 15 minutes more. Spoon over the pasta or white rice before serving.

Makes 6 servings.

Wednesday, October 04, 2006

Ginger Cookies


Oh y'all!! I made the BEST Ginger Cookies yesterday!! I usually like to make gingersnaps, but I was looking for something that was less fattening. I found this recipe and I LOVE these!! They were good last night, but they were even BETTER today!! They are so soft and very tasty!

You know, I had really wanted to take a picture of the cookies to show y'all, but, um, well, you see, we ate them all already!!

(NOTE: For anyone following Weight Watchers, the nutritional information is below the recipe)

Ginger Cookies
Recipe By: Cooking Light, Mar/Apr 1993, page 104

6 tbsps margarine -- softened
2/3 c sugar
1/4 c molasses
1 egg
2 c all-purpose flour
2 tsps baking soda
1 tsp ground ginger
1 tsp ground cinnamon
1/2 tsp ground mace
3 tbsps sugar
Vegetable cooking spray

Cream margarine; gradually add 2/3 cup sugar, beating at medium speed of an electric mixer until light and fluffy. Add molasses and egg; beat well. Combine flour and next 4 ingredients; gradually add to creamed mixture,stirring until well blended. Divide dough in half; wrap each portion in plastic wrap, and freeze for 30 minutes. Shape each portion of dough into 26 (1-inch) balls, and roll in remaining 3 tablespoons sugar. Place 2 inches apart on cookie sheets coated with cooking spray. Bake at 350º for 12 minutes or until lightly browned. Remove from sheets; cool on wire racks. Makes 26 Cookies.

Per serving: 46 Calories; 1g Fat (27% calories from fat); 1g Protein; 8g Carbohydrate; 3mg Cholesterol; 65mg Sodium

Tuesday, October 03, 2006

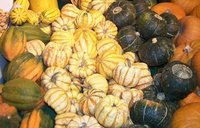
Meet the Squash family!!!


Last night at our church's monthly Ladies Fellowship, we shared many delicious dishes together. Our theme for this month was "Pumpkins and Squash" and the ladies showed up with a HUGE variety of meals, appetizers, desserts and drinks that were either pumpkin or squash related. We had a fantastic time!!


This is some information I shared about the winter and summer squashes. I love the way that the Lord created so many bright looking, good tasting vegetables that are so good for us, too!!!

History of Squash
Modern day squash developed from the wild squash that originated in an area between Guatemala and Mexico. Christopher Columbus brought squash back to Europe from the New World, and like other Native American foods, their cultivation was introduced throughout the world by Portuguese and Spanish explorers. Today, the largest commercial producers of squash include China, Japan, Romania, Turkey, Italy, Egypt, and Argentina.

Winter Squash
Winter squash is an excellent source of vitamin A. It is also a very good source of vitamin C, potassium, dietary fiber, and manganese. In addition, winter squash is a good source of folate, omega-3 fatty acids, thiamin, copper, vitamin B5, vitamin B6, niacin and copper.


Varieties of winter squash include:
Butternut squash: Shaped like a large pear, this squash has cream-colored skin, deep orange-colored flesh and a sweet flavor.
Acorn squash: With harvest green skin speckled with orange patches and pale yellow-orange flesh, this squash has a unique flavor that is a combination of sweet, nutty and peppery.
Hubbard squash: A larger-sized squash that can be dark green, grey-blue or orange-red in color, the Hubbard's flavor is less sweet than many other varieties.
Turban squash: Green in color and either speckled or striped, this winter squash has an orange-yellow flesh whose taste is reminiscent of hazelnuts.
Pumpkins: The pumpkin with the most flesh and sweetest taste is the small sized one known as sugar or pie pumpkin, the latter referring to its most notable culinary usage.


This group also includes acorn squash (available all year-round), butternut squash, buttercup squash, green and blue hubbard squash, green and gold delicious squash, and banana squash. Winter squash is most plentiful from early fall until late winter

Summer Squash
Summer squash is an excellent source of manganese and vitamin C. It is also a very good source of magnesium, vitamin A, dietary fiber, potassium, copper, folate, and phosphorous. In addition, summer squash is a good source of omega-3 fatty acids, vitamin B1, vitamin B2, vitamin B6, calcium, zinc, niacin, and protein.


Varieties of summer squash include:
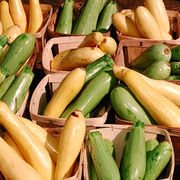
Zucchini: Probably the best known of the summer squashes, zucchini is a type of narrow squash that resembles a cucumber in size and shape. It has smooth, thin skin that is either green or yellow in color and can be striped or speckled. Its tender flesh is creamy white in color and features numerous seeds. Its edible flowers are often used in French and Italian cooking.
Crookneck and Straightneck Squash: Both of these summer squashes have creamy white flesh and generally have yellow skins, although sometimes you can find them with green skin. Crookneck squash is partially straight with a swan-like neck. It was genetically modified to produce its Straightneck cousin that is shaped as its name implies.
Pattypan Squash: This small saucer-shaped squash features skin that can either be pale green or golden yellow in color. Its cream-colored flesh is more dense and slightly sweeter than the zucchini.


They also include the yellow crookneck, the large Straightneck, the greenish-white patty pan (petit pan), and the slender green zucchini. The EPA would also include crookneck squash, scallop squash, spaghetti squash, Chinese okra, bitter melon, balsam pear, balsam apple, Chinese cucumber, and chayote. Some of these squash are available at all times of the year.


Pasta with Pumpkin and Sausage


This is the recipe that I shared with the ladies at our monthly Ladies Fellowship at church. Originally it is a Rachael Ray recipe, but I made some changes for our family.
Enjoy!!!
Pasta with Pumpkin and Sausage
Modified version of a Rachael Ray recipe

1 tablespoon extra-virgin olive oil, plus 1 tablespoon
1 pound bulk sweet Italian sausage
4 cloves garlic, cracked and chopped
1 medium onion, finely chopped
1 bay leaf, fresh or dried
4 to 6 sprigs sage leaves, cut into chiffonade, about 2 tablespoons
2 cups chicken stock, canned or paper container
1 cup canned pumpkin
1/2 cup (3 turns around the pan) half and half
1/8 teaspoon ground cinnamon
1/2 teaspoon ground nutmeg, ground or freshly grated
Coarse salt and black pepper
1 pound penne rigate, cooked to al dente
Romano or Parmigiano, for grating

Heat a large, deep nonstick skillet over medium high heat. Add 1 tablespoon of olive oil to the pan and brown the sausage in it. Transfer sausage to paper towel lined plate. Drain fat from skillet and return pan to the stove. Add the remaining tablespoon oil, and then the garlic and onion. Sauté 3 to 5 minutes until the onions are tender.
Add bay leaf, sage, and wine to the pan. Reduce wine by half, about 2 minutes. Add stock and pumpkin and stir to combine, stirring sauce until it comes to a bubble. Return sausage to pan, reduce heat, and stir in cream. Season the sauce with the cinnamon and nutmeg, and salt and pepper, to taste. Simmer mixture 5 to 10 minutes to thicken sauce.

Return drained pasta to the pot you cooked it in. Remove the bay leaf from sauce and pour the sausage pumpkin sauce over pasta. Combine sauce and pasta and toss over low heat for 1 minute. Garnish the pasta with lots of shaved cheese and sage leaves.

Monday, October 02, 2006

Eggplant Stew


After my post about what to do with an eggplant, I really got busy searching recipes using eggplant. When I'm trying a new recipe with a new ingredient (like eggplant), I have to really be picky about how I introduce it to Mr. U. If you ask him if he likes eggplant, he'll tell you "no". However, I know that with the right ingredients, he would LOVE it!! So...after much searching, I found this recipe. Well, this is not the original recipe that I found... I had to tweak it a bit to make it "mine" and I'll bet that most of y'all do the same thing, too. Here is Eggplant Stew...


Eggplant Stew

8 servings

1 tablespoon extra virgin olive oil
1 medium onion, chopped
1 pound ground beef
2 cloves garlic, minced
1 pound eggplant, diced
3/4 cup finely diced carrots
3/4 cup sliced celery
2 (14.5 ounce) cans diced tomatoes, undrained
1 tsp. Italian seasoning
3 bouillon cubes with 3 ½ cups water OR 2 (14 ounce) cans beef broth
1 teaspoon sugar
1/2 teaspoon ground nutmeg
1 teaspoon salt
1/2 teaspoon ground black pepper
1/2 cup dry macaroni
1/2 cup grated Parmesan cheese

1. Heat the oil in a skillet over medium heat, and cook the onion, beef, and garlic until beef is evenly brown. Drain grease, and mix in eggplant, carrots, celery, and tomatoes and Italian seasoning. Pour in beef broth. Mix in sugar, and season with nutmeg, salt, and pepper. Bring to a boil, then cover and simmer for about 30 minutes.
2. Stir dry macaroni into the stew, and continue cooking 15 minutes, or until the macaroni is al dente. Top with Parmesan cheese to serve.

As it turns out, Mr. U LOVES this recipe! He took one bite and pronounced it a keeper!! Woohooo!!!

LinkWithin

Blog Widget by LinkWithin